

Encryption at the core is a super complex set of algorithms which encode and decode a file into unreadable bits if you don’t have both the key and the cipher. If you don’t understand what this means, this post is for you.
Let me put it a little easier. For the layman, you don’t need to know anything about ciphers or algorithms. You just need to know how to use a simple, free and open source software, which is exactly what I’m going to introduce you to.
What the software does, is it takes your files, it scrambles them up, and it only unscrambles them with a password (the cipher, or the key). Let’s pretend you’ve got a file called passwords.txt, and it contains your password, H3ll0!. Well, if someone were to open your file, instead of seeing your password, they might see a huge random string of characters such as !TFCQYbQ2ysa3HQ5 instead. The reason this might happen, is that they don’t have the password, which will essentially unscramble your file.
Sound complicated? The technology itself is, but using this free application is not. The software I’m talking about is Cryptomator. It’s open source, which means that people who understand code, can take a look at it to ensure it’s safe, and people can even contribute to it if they see any bugs. I personally love open source software, and Cryptomator is one of my favorite pieces of it.
Start by downloading Cryptomator and installing it. I won’t walk you through this portion. It’s the same as installing anything else. It’s available on Windows, Mac, and Linux (even on your phone too, but we’ll need a computer to start). Because it’s available on all those platforms, I’m not going to walk through the install process.
Once installed, you’ll be greeted with the main Cryptomator screen. Once set up, you shouldn’t really need to come back here at all. This is just where you’ll go to create a new vault.
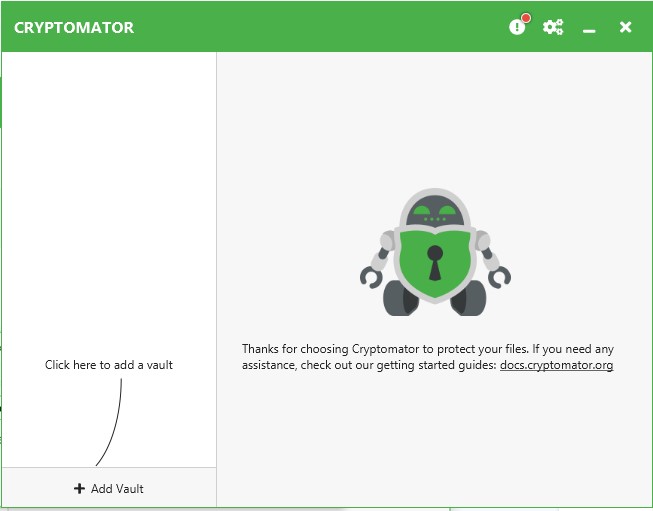
Just like the screen says, go ahead and click the “+ Add Vault” button. From here, click “Create New Vault” and then give it a name. It can be literally anything you’d like. I’m calling mine “Cloud Example” just to show you guys, but you should call it something else.
Now is where the “tricky” part is, if you want this to be on the cloud. I say “tricky” because it’s super easy if you’ve got your cloud provider’s application on your device. For me, I use pCloud, I got a 2TB lifetime deal from them years ago and it’s been magnificent. This can literally be any cloud provider, it does not matter, as long as they have an application which lets you mount your drive to your computer. This being said, you must choose one which lets you do this. That means you can use pCloud, Box, Dropbox, Google Drive, the list goes on and on. There are some new cloud providers which do not have apps, and those will not work (they only allow uploading through the browser).
So, for me, I have pCloud mounted at my P: drive, so I’ll just choose to put it in here. Note: you do not have to put this on a cloud provider. This can just be on your local drive.

From here, create a password. DO NOT FORGET THIS PASSWORD. You, and you alone, have access to this. If you forget the password, you will not EVER be able to recover your files. Perhaps you should use a password manager so you don’t forget? I have a handy guide on how to set one up. Of course, there’s the recovery key option which you can choose (and I would recommend you do) but make sure you store this in a safe place. If you just paste it in a file on your desktop, you’ve kind of defeated the purpose of your whole security, so maybe print it out and store it in a safe, or copy the words and put them into bitwarden, like I’ve instructed you to do before!

Unlock your drive, then click “reveal” and you’re done! Congratulations, you’ve done the most difficult part of encrypting, which is setting it up.
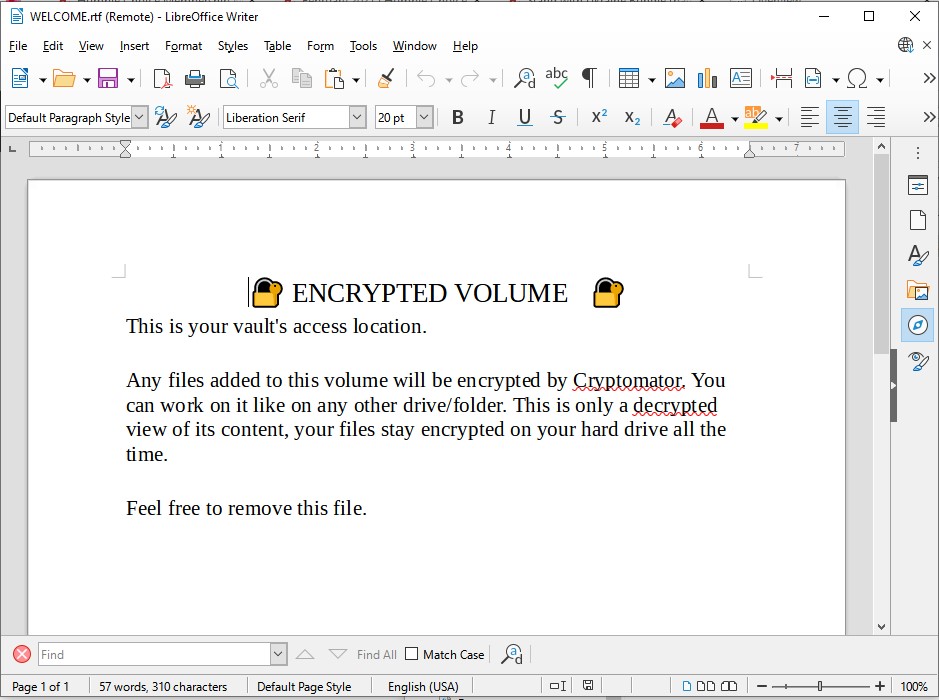
Let me show you what I was talking about in the beginning, and why this is more secure. In the new folder which was created, you’ll see a “WELCOME” file. If you open it up, you’ll see that you can read it plainly, and that’s because it’s been unlocked to you, on your computer and nowhere else.
If we try and look at this in the root folder, the one in the P: drive, you’ll see that not only can I not read the file at all, I can’t even see the file’s existence.
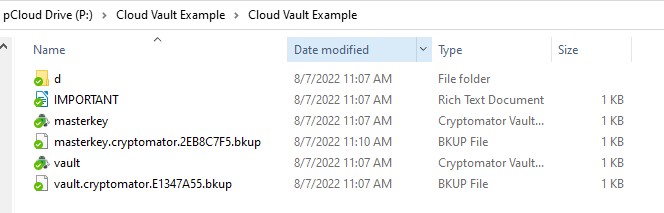
The only thing you can access is that one text file called “IMPORTANT” and it simply reminds you not to put your files directly in here. These files are exactly what your cloud provider can see, just a bunch of random characters inside of the random folders. This means that nobody but you can see what you’ve got stored in that drive.
You can have all of your private files available to you, accessible to any computer, phone, or tablet which can have pCloud on it, completely safe and secure.
To encrypt more files now, you simply drag them into your encrypted folder.

That’s it. All of your important files are completely safe from prying eyes, including from any kind of cloud provider. This means that you can store any files you’d like online without any kind of risk of your files triggering any kind of algorithm matches. Many storage providers have flagged copyrighted materials even when you legally own a license, and this way you can be guaranteed not to flag those. You’re also safe to store your personal and financial files without any fear of them being discovered by a malicious hacker. You just need to make sure you’re storing a super safe and secure password.